Hello Worldの次のステップとして,デザインの変更にとりかかりました.eclipseでプロジェクトを作成した際に自動で生成されるファイルを解析しつつ,まずは縦に4つのボタンを並べて表示するプログラムを作成しました.
プロジェクトの作成
1.
[ファイル]→[新規]→[その他]→[Android]→[Android プロジェクト]を選択し[次へ]ボタンを押下.
2.
次の項目を設定し,[完了]ボタンを押下.
[プロジェクト名]:LayoutTest
[ターゲット名]:Android 2.2
[アプリケーション名]:LayoutTest
[パッケージ名]:org.example.layout
[Create Activity]:LayoutTest
プログラム(LayoutTest.java)の確認
プロジェクトを作成した段階で,次のコードが自動で生成されます.
/LayoutTest/src/org/example/layout/LayoutTest.java
package org.example.layout;

import android.app.Activity;
import android.os.Bundle;

public class LayoutTest extends Activity {
    /** Called when the activity is first created. */
    @Override
    public void onCreate(Bundle savedInstanceState) {
        super.onCreate(savedInstanceState);
        setContentView(R.layout.main);
    }
}
11行目のsetContentViewメソッドはアクティビティにビューを追加する処理です.R.Layout.mainはres/layoutディレクトリのmain.xmlファイルを参照することを表しています.main.xmlの内容がユーザインタフェースに関わってきます.
main.xmlとstrings.xml
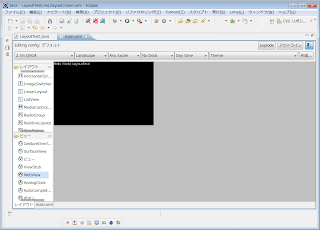
res/layout/main.xmlを開き,[レイアウト]エディタを選択すると次のような画面が表示されます.

レイアウト,ビューの要素を黒い画面部分にドラッグ&ドロップすることで部品の配置ができるようですが,まだ使い方よく分かりません.[main.xml]エディタを開くと次のようなコードが記述されています.
/LayoutTest/res/layout/main.xml
<?xml version="1.0" encoding="utf-8"?>
<LinearLayout xmlns:android="http://schemas.android.com/apk/res/android"
    android:orientation="vertical"
    android:layout_width="fill_parent"
    android:layout_height="fill_parent"
    >
<TextView
    android:layout_width="fill_parent"
    android:layout_height="wrap_content"
    android:text="@string/hello"
    />
</LinearLayout>
どうやらLinearLayoutタグ内の属性値を変更することでレイアウトが変更できそうです.
android:orientation
LinearLayoutの方向を設定します.verticalを設定すると上から下へ,horizontalを設定すると左から右へ配置されます.
android:layout_width,android:layout_height
それぞれ幅と高さの長さを指定します.fill_parentを設定すると画面いっぱい使い,wrap_contentとすると必要に応じて可変となります.
また,LinearLayoutタグの中にTextViewタグがありますが,これはテキストラベルの表示を定義するそうです.
android:text="@string/hello"
これは,res/values/strings.xmlにおいて属性名nameが"hello"の要素を参照するようです.androidではテキスト文字やパラメータはxmlに記述しておくのが慣習なのでしょうか?
/LayoutTest/res/values/strings.xml
<?xml version="1.0" encoding="utf-8"?>
    <resources>
    <string name="hello">Hello World, LayoutTest!</string>
    <string name="app_name">LayoutTest</string>
</resources>
レイアウトの変更
main.xmlとstrings.xmlを次のように変更しました.4つのボタンAlfa,Beta,Gamma,Deltaを縦に4つ並べるデザインです.ボタンはButtonタグで記述でき,TextViewと同様の属性が設定できます.
/LayoutTest/res/layout/main.xml
<?xml version="1.0" encoding="utf-8"?>
<LinearLayout xmlns:android="http://schemas.android.com/apk/res/android"
    android:orientation="vertical"
    android:layout_width="fill_parent"
    android:layout_height="fill_parent"
    >
<Button
    android:layout_width="fill_parent"
    android:layout_height="wrap_content"
    android:text="@string/alfa"
    />
<Button
    android:layout_width="fill_parent"
    android:layout_height="wrap_content"
    android:text="@string/beta"
    />
<Button
    android:layout_width="fill_parent"
    android:layout_height="wrap_content"
    android:text="@string/gamma"
    />
<Button
    android:layout_width="fill_parent"
    android:layout_height="wrap_content"
    android:text="@string/delta"
    />
</LinearLayout>
/LayoutTest/res/values/strings.xml
<?xml version="1.0" encoding="utf-8"?>
<resources>
    <string name="app_name">LayoutTest</string>
    <string name="alfa">Alfa</string>
    <string name="beta">Beta</string>
    <string name="gamma">Gamma</string>
    <string name="delta">Delta</string>
</resources>

環境整ったら、こっちでもやってみます。
返信削除